In this guide you will learn how to add new m-bus meters, add new meter replacements and edit basic meter information in the mobile version of Leanheat® Monitor.
Adding an M-bus meter
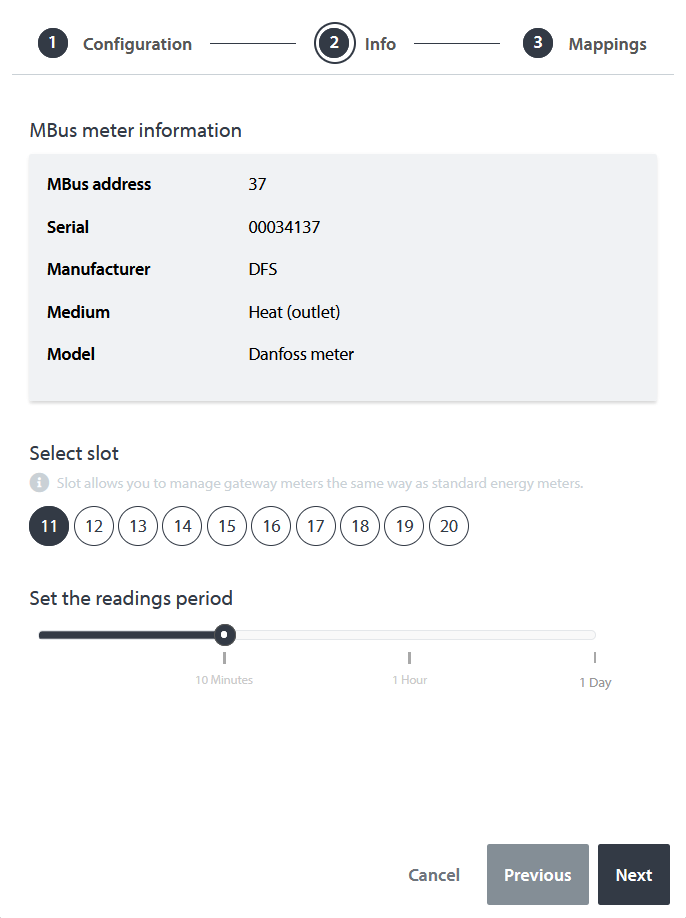
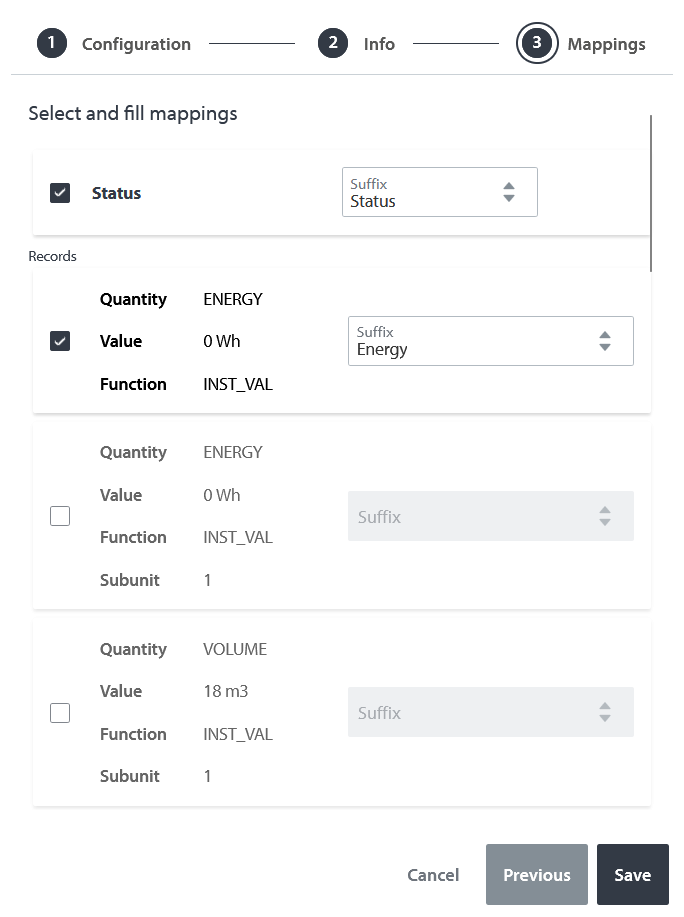
To add a meter as an M-bus meter select a device you wish to add the meter to. Tap on the "Meters" tab and tap "+ Add mbus meter". In the first step enter the meter name and the M-bus address. After Leanheat Monitor reads the meter you will see manufacturer information and you need to select the readings period of the meter and the meter slot (meter slot represents the consecutive meter number). In the next step tick the check box next to the registers you would like to be displayed and the data stored in Leanheat Monitor. For each register also verify/pick the correct suffix from the possible options which are displayed in the drop down menu when tapping "Suffix". To finish adding the meter tap "Save".
Meter replacements
Meter replacements are necessary to make in Leanheat Monitor when a meter is replaced physically we have to enter the accumulated values (volume, energy, tariff) from the previous meter and the accumulated values from the new meter. This is to ensure that the reports created in Leanheat Monitor keep accurate values.
To enter a meter replacement firstly tap on the device which has the meter that was replaced connected. On the selected device navigate to the "Meters" tab. Next tap on the meter that was replaced, tap on the "Meter replacements" tab under "Basic information" and tap"+ Add meter replacement". In the menu that opens enter the accumulated values of the "old" meter and accumulated values of the "new" meter. To finish the meter replacement process tap "Save".

Meter metadata
To edit meter metadata such as meter name, replacement date and meter purpose (billing, control, production, consumption) navigate to the device which has the meter connected, tap on the "Meters" tab, tap the meter you wish to edit, click "Basic information" and tap "Edit".
Meter replacement dates need to be set to use see the dates in the "Next replacement date" widget.
Comments
0 comments
Please sign in to leave a comment.